Microsoft Azure Virtual Machine Day-5 Bootcamp
What is Azure Virtual Machine?
Azure VM is a computing service that allows users to host their applications or systems in the cloud on Windows and Linux operating systems. Azure VMs provide users with flexible virtualization without having any upfront investment and maintenance costs in physical infrastructure that runs them.
The Azure VM platform allows users to generate their own VMs, flexibly and conveniently work without worrying about their computing environment, increase VM capacity, and choose where they want data to reside.
Why Use Azure Virtual Machines?
Scalability and Load Balancing
Through distributing workloads across various virtual machines, VMs expedite application scaling. Azure Virtual Machines have autoscaling features that simplify and improve scaling to thousands of VMs. And Azure’s load balancing capabilities distribute traffic between virtual machines, regardless of whether they are internet-facing or not.
Agility
The ability to manipulate servers akin to data shows the impact of virtualization technology. Users can deploy what was previously a predominantly physical resource as software in a handful of minutes. By providing rapid deployment ability, users enjoy the agility to meet and reconfigure organizational and infrastructure needs.
Out-of-the-Box Tools
Azure VMs provide prebuilt templates and out-of-the-box tools that save time for users, greatly improving their processes. They are also highly customizable and accessible across numerous internet-connected devices.
Enhanced Organizational Efficiency
The time and energy IT teams need to maintain VM host machines is much less than the time invested in hardware maintenance. As such, IT teams can spend more time in other productive tasks, improving efficiency.
Features and Capabilities :-
Azure Virtual Machine Scale Sets
Azure Virtual Machine Scale Sets enable users to manage and scale up to thousands of virtual machines on both Windows and Linux platforms. Customers can generate and deploy thousands of VMs while enjoying intrinsic autoscaling and load balancing capabilities powered by centralized templates.
They also enjoy a selection of VM images and consumption models that satisfy their needs, as well as complete control of individual VMs in a scale set.
Azure Compute
Azure compute gives users the ability to access a diversified Azure VM portfolio through a wide scope of compute options. These virtual machines are capable of accommodating vast workloads, including the applications users create.
Flexible Pricing
Azure Virtual Machines use an economical approach in per-second billing to allow users to pay only for the compute time they use. Users can also optimize their infrastructure and reduce costs through one-year or three-year Azure Reserved Virtual Machine Instances terms.
Pricing flexibility extends to spot pricing on virtual machines and scale sets to execute interruptible workloads at great discounts in comparison to pay-as-you-go offerings.
Azure VM Use Cases :-
Development and Testing
Providing application developers with hardware to develop and test their applications is no longer the only viable approach to application development and testing. The intrinsic cost of hardware with competent specifications to support development needs, as well as the depreciating effectiveness of hardware over time, present a financial concern to enterprises.
Furthermore, these physical workstations may be inflexible, as developers are constrained on where and how they work. Azure Virtual Machines provide a simple and fast way to create a computing environment with the configurations needed to develop and test an application.
Extended Data Center
Azure Virtual Machines can easily be linked to an organization’s network to extend on-premises data centers. Having an on-premises environment alongside a cloud environment fashions a hybrid cloud, which offers organizations flexibility while effectively utilizing legacy systems.
As such, enterprises can develop and deploy applications that can be integrated with both cloud-native and on-premises services. Organizations can also expand their data center capacity or occupy new geographical areas without having to build new on-premises data centers.
Cloud Applications
Create a Linux virtual machine in the Azure portal
Sign in to Azure
Sign in to the Azure portal.
Create virtual machine
Enter virtual machines in the search.
Under Services, select Virtual machines.
In the Virtual machines page, select Create and then Virtual machine. The Create a virtual machine page opens.
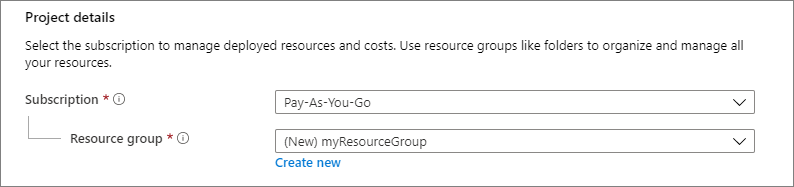
In the Basics tab, under Project details, make sure the correct subscription is selected and then choose to Create new resource group. Enter myResourceGroup for the name.*.
Under Instance details, enter my VM for the Virtual machine name, and choose Ubuntu 18.04 LTS - Gen2 for your Image. Leave the other defaults. The default size and pricing is only shown as an example. Size availability and pricing are dependent on your region and subscription.
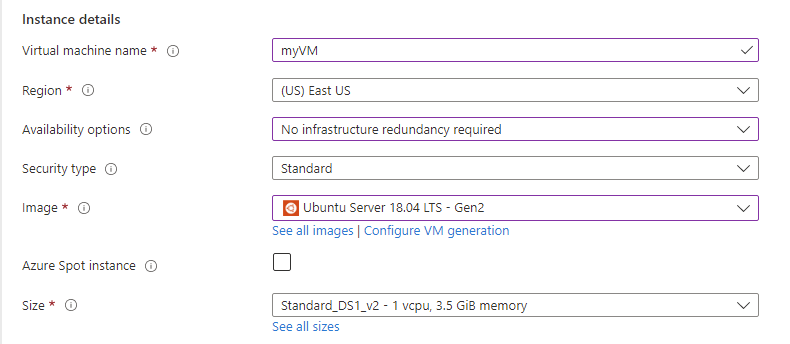
Note
Some users will now see the option to create VMs in multiple zones.

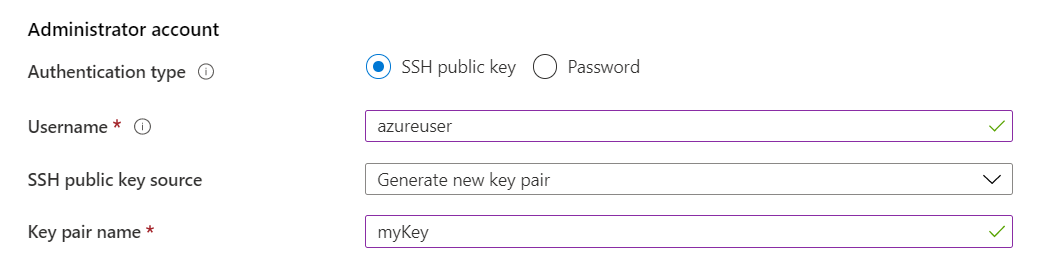
Under Administrator account, select SSH public key.
In Username enter azureuser.
For SSH public key source, leave the default of Generate new key pair, and then enter myKey for the Key pair name.
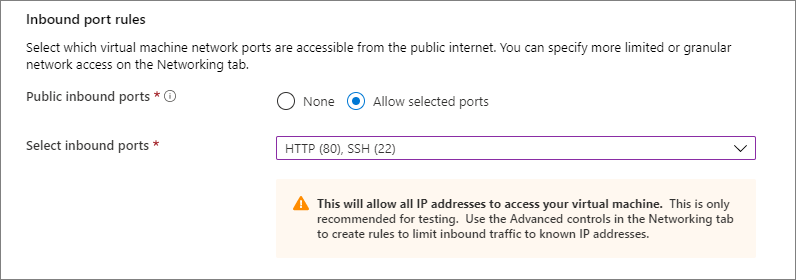
Under Inbound port rules > Public inbound ports, choose Allow selected ports and then select SSH (22) and HTTP (80) from the drop-down.
Leave the remaining defaults and then select the Review + create button at the bottom of the page.
On the Create a virtual machine page, you can see the details about the VM you are about to create. When you are ready, select Create.
When the Generate new key pair window opens, select Download private key and create resource. Your key file will be download as myKey.pem. Make sure you know where the
.pemfile was downloaded; you will need the path to it in the next step.When the deployment is finished, select Go to resource.
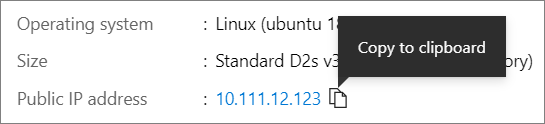
On the page for your new VM, select the public IP address and copy it to your clipboard.
Connect to virtual machine
Create an SSH connection with the VM.
If you are on a Mac or Linux machine, open a Bash prompt. If you are on a Windows machine, open a PowerShell prompt.
At your prompt, open an SSH connection to your virtual machine. Replace the IP address with the one from your VM, and replace the path to the
.pemwith the path to where the key file was downloaded. Console: ssh -i .\Downloads\myKey.pem azureuser@10.111.12.123
Install web server
To see your VM in action, install the NGINX web server. From your SSH session, update your package sources and then install the latest NGINX package.
When done, type exit to leave the SSH session.
View the web server in action
Use a web browser of your choice to view the default NGINX welcome page. Type the public IP address of the VM as the web address. The public IP address can be found on the VM overview page or as part of the SSH connection string you used earlier.


.png)
Comments
Post a Comment